
Articles tagged 'rubymotion'
How to integrate your RubyMotion OS X app with a JSON based web API Nov 22 2013
In our last article on RubyMotion OS X apps, we built a status bar app that fetched data in the background to keep the menu item continually updated and showing the latest information. Our data source was from the local system, fetching the CPU usage statistics. In this article we'll look at how to integrate with a JSON web API, making HTTP calls from your RubyMotion app, processing the response, and showing that in the menu.
You have to commit
The little utility app we'll build will be a very basic and straightforward one to show the latest commits from projects you have access to on GitHub. GitHub has a wonderful JSON API, complete with very good documentation, and for developers, utility apps integrating with GitHub can be very useful indeed. You can follow along with the code in the article, and the app is open source and available in full here too.
Familiar start
By now if you've been following along with the RubyMotion on OS X series of articles, you'll know our starting point. We'll use the template gem from our first article to spin up a new app. Let's fire up a blank status bar app now:
motion create --template=osx-status-bar-app CommitTrackerMenu
Dependencies
First thing we'll do is add the gems we'll need, BubbleWrap, and motion-yaml. Your Gemfile should look something like this:
source 'https://rubygems.org'

gem 'rake'
gem 'bubble-wrap'
gem 'motion-yaml'
Remember to run this when you're done too:
bundle install
Configuration
We'll come to BubbleWrap in a minute, but we're using motion-yaml for the configuration for the app - to load our config file and ready it for use in our code, add the following to your AppDelegate:
class AppDelegate
  CONFIG = YAML::load(NSMutableData.dataWithContentsOfURL(
    NSBundle.mainBundle.URLForResource("config", withExtension: "yml")).to_s)
This finds the config in the root of the resource bundle, and loads the YAML contents into the constant. You'll see an example config file in the GitHub repo for the code, you just need to rename config.yml.example to config.yml and fill in your GitHub personal access token - you can get one by visiting here. You can also amend the timer config to specify how often to check for new updates. It should end up looking something like this:
timer: 30
github_token: TOKEN
GitHub integration
Now, let's work on integration with the API itself - this is where BubbleWrap comes in handy. This gem is a fantastic collection of all sorts of great functionality, nice Ruby wrappers around more complicated Cocoa APIs, shortcuts for often used features, and helpers that take advantage of Ruby language features to provide nicer ways of doing things. It's a veritable Swiss Army Knife for iOS and OS X development.
We'll be using BW::HTTP and BW::JSON to grab the data we need and to parse it. We've separated out our GitHub integration into a separate class to make it easier to read, so here it is in full:
class GitHub
  attr_accessor :token, :user

  def initialize(token, &block)
    @token = token
    self.user do |json|
      @user = json
      block.call
    end
  end

  def user(&block)
    self.get("https://api.github.com/user", &block)
  end

  def events(&block)
    self.get(@user['received_events_url'], &block)
  end

  def get(url, &block)
    BW::HTTP.get(url, {:credentials => {:username => @token, :password => ""}}) do |response|
      block.call(BW::JSON.parse(response.body))
    end
  end
end
There isn't a lot to this, essentially we initialize the client with our personal access token. It immediately uses the token to do a quick check, and load the authenticated user JSON - this way we don't need further user details such as username to make additional calls. It'll call any block passed into that initialization method when that process is complete, allowing you to wait until the client is ready before doing anything else.
We have a method to retrieve events for the user which we'll be using as our data source in the status bar itself in a minute, but you'll see both that and the authenticated user call are wrappers themselves around the get method, which uses the BubbleWrap HTTP methods to easily call to the URL, passing the provided credentials (using the token over basic auth for GitHub means providing the token as the username, and leaving the password blank), and then processing the response body. In this case, we use the BubbleWrap JSON support to parse the body and return an array or hash parsed from the API.
Lastly, you'll notice too that in the events method, we're using something provided by the response from the authenticated user check as the URL (received_events_url returned within @user). The GitHub API helpfully returns other API call URLs within the authenticated user response, which we can then parse and use for further calls. This way, if their API changes and they move or update URLs, our code won't break as it's using the pointer to the right method provided by GitHub themselves, rather than a hard-coded URL!
Menu setup
With that out of the way, we can now focus back on our status bar app. First, we need to setup our menu items, so our applicationDidFinishLaunching method should look like this:
def applicationDidFinishLaunching(notification)
  @app_name = NSBundle.mainBundle.infoDictionary['CFBundleDisplayName']

  @status_menu = NSMenu.new
  @status_menu.delegate = self

  @status_item = NSStatusBar.systemStatusBar.statusItemWithLength(NSVariableStatusItemLength).init
  @status_item.setMenu(@status_menu)
  @status_item.setHighlightMode(true)
  @status_item.setTitle(@app_name)

  @http_state = createMenuItem("Loading...", '')
  @http_state.enabled = false
  @status_menu.addItem @http_state

  @status_menu.addItem createMenuItem("About #{@app_name}", 'orderFrontStandardAboutPanel:')
  @status_menu.addItem createMenuItem("Quit", 'terminate:')

  @unseen = 0
  @github = GitHub.new(CONFIG[:github_token]) do
    self.checkForNewEvents
  end
end
This should be fairly familiar if you've been following along with the previous articles. A few key differences, we're setting the delegate on the status menu to the app delegate itself - we're doing that so we can look out for a specific event, but we'll come back to that a little later.
We're creating a disabled menu item, @http_state, used just to display information on the state of the app, so we can update it to show when we're doing different things. We instantiate it and set it to show "Loading…" to start with.
We then instantiate the GitHub client, and pass in a block that will get called when the initial authenticated user JSON is returned - we need to wait for this, as any subsequent calls won't work until that has completed. We can then kick off our check for new events. This is where we check with our data source, in this case the GitHub API, and it's where the meat of the app lies.
Events
The method that checks for and processes events from the GitHub API does quite a lot, so we'll step through it and explain how it works - if you want to see the entire thing, you can do so here.
def checkForNewEvents
  begin
    @http_state.title = "Working..."
    @github.events do |events|
      @http_state.title = "Processing..."
We start by setting our @http_state menu item to show us as working, and then as soon as we get the response from GitHub, we switch that to processing.
unless events.empty?
  @events.each { |item| @status_menu.removeItem(item) } unless @events.nil?
  @events = []
  @urls = {}
  @last_commits = @commits || []
  @commits = []
Here we make sure that we have something to process, and then we are removing any menu items that we had previously pertaining to events. Each time this runs it'll clear out the event menu items, and recreate them based on the data found. In addition to the variable to track those menu items (@events), we also have a hash to track URLs (@urls), which comes into play when we're handling menu item clicks for these events, as well as a couple of variables to help us track what's new between calls (@commits and @last_commits).
counter = 0
events.reverse.each do |event|
  next unless event["type"] == "PushEvent"
  next if event["payload"].nil? || event["payload"]["commits"].nil?

  commits = event["payload"]["commits"].select { |c| c["distinct"] }

  next if commits.length == 0
We're now going to loop through all the events returned - we do so in reverse order, as we'll be adding each menu item in at a specific index, which will in turn push all of those before it further down. So that we end up with date descending (newest first) order in the end, we reverse things to begin with.
We're skipping over any event that isn't a push event (code being pushed up to a repository), and that doesn't have a payload or commits.
Lastly, we also ignore any commits that aren't distinct - this is a very handy flag provided by GitHub from their API, and by distinct they mean if a commit has been seen in the repo before, i.e. if something was pushed as part of a branch, it'd be distinct, but then merging it into master, it's the same commit, and it is no longer distinct. We only want to be notified of entirely new commits, so we filter out anything that isn't distinct.
actor = event['actor']['login']
repo = event['repo']['name']

commits.each do |commit|
  message = commit['message'].split("\n").first
  message = "#{message[0...30]}..." if message.length > 35
  @urls[counter] = commit['url'].gsub("api.", "").gsub("/repos", "").gsub("/commits", "/commit")
  item = self.createMenuItem("[#{actor}]: #{repo} - #{message}", 'pressEvent:')
Now we loop through the commits we have left to look at, and we'll do a bit of processing on the message and URL. We want to truncate the message to a reasonable uniform length, and we need to mess with the URL a bit as the URL returned from GitHub points to the commit within the API, and we want a URL we can open in a browser to show the commit - the always useful String gsub method comes in handy there as we stash the URL in our @urls hash for looking up later.
We then setup the menu item, similarly to how we've done before. Each item will use the same event handler, which we'll look at shortly. One thing to note is that by specifying pressEvent:, instead of just pressEvent (note the trailing colon), then our event handler will be sent an argument, the sender of the event, in this case the item itself. As we're handling all of the item events with the same event handler method, and using the tag on the item to lookup the URL to show, it'll be quite handy to be sent the clicked item!
    item.tag = counter
    @events << item
    @status_menu.insertItem(item, atIndex: 1)
    counter += 1
    @commits << commit['sha']
  end
end
Here we set a tag on the item, and this is where our counter comes in - we can only use an integer for the tag, but we need a reference to our URL for use in the event handler. So we've used the counter as a numeric pointer to the URL in our URLs hash (@urls), and we set it on the item so we can match the two together. We are then keeping track of our event menu item (so we can remove it from the menu next time we re-process), and then insert the item into the menu at the same index for each item. We're doing it at index 1 instead of index 0 so as to always leave the @http_state menu item at the top of the menu as the others get pushed down with each new item added.
We then increment our counter for the next commit, and stash the unique SHA reference for the commit in @commits so we can compare which commits we've seen this time with last time for working out which commits are new.
  @unseen += (@commits - @last_commits).length
  self.showUnseenCommits
end
Here we use our arrays of the commit references (@commits for this time, @last_commits for the last time around) to deduce how many new commits there are in this run, and add that to our unseen total tracking variable, @unseen. The method to show those we'll get into below.
    @http_state.title = "Ready"
  end
rescue
  @http_state.title = "Error, retrying again shortly"
If everything finishes as expected, we set the @http_state menu item to show things as ready for the next call - and if we experienced an error, we make that clear too.
  ensure
    NSTimer.scheduledTimerWithTimeInterval(CONFIG[:timer],
      target: self,
      selector: 'checkForNewEvents',
      userInfo: nil,
      repeats: false)
  end
end
Whatever happens though, the ensure part of the begin/rescue/ensure block will always end by triggering the next call. We're using our timer configuration to schedule the same method to be called again. We do this rather than simply call it once at the beginning but with repeats set to true, because the call itself and subsequent processing will take a variable amount of time. For the most part it's very quick, but network slowdowns, poor connections, or timeouts could cause it to take a bit longer. We want our delay between calls to be just that - between calls, not between the time each call is kicked off, regardless of result. From the time our processing ends, to the time it runs again, will be the value we've configured.
Mark all as read
We have a couple of steps left to flesh out. Above we called showUnseenCommits after incrementing how many unseen commits there were - it's a fairly simple update to the title of the main system menu item for our app:
def showUnseenCommits
  @status_item.setTitle("#{@unseen.zero? ? 'No' : @unseen} new #{@unseen == 1 ? 'commit' : 'commits'}")
end
When we click on the menu, it'd be good to clear the message, sort of a mark all as read. This is the reason we set the delegate for the status menu to be the app delegate itself - luckily we can easily handle the event of the menu opening (in response to the click) by implementing menuWillOpen, and in there we can clear the message by setting @unseen to zero and updating the status menu text:
def menuWillOpen(menu)
  @unseen = 0
  self.showUnseenCommits
end
Click to view
Lastly, when we click on an item, it'd be great to go to that commit on GitHub for viewing. We've already stashed the URLs when processing the events above, and so we now just need to lookup the particular URL, which we can do with the numeric tag property on the item. That's our pointer into the URLs hash, @urls, and so our event handler looks like this:
def pressEvent(item)
  NSWorkspace.sharedWorkspace.openURL(NSURL.URLWithString(@urls[item.tag]))
end
NSWorkspace.sharedWorkspace.openURL is a nice way to use your system default way of opening a URL, i.e. your default browser. Easy!
You can now fire up the app to see it all working together.
Wrapping up - questions?
And that's about it - much like last time, we've built a status bar app that runs in the background, updating from a data source. This time though we used HTTP calls and JSON processing to interact with a 3rd party API to make the data a bit more interesting, we used YAML for file configuration, we used a timer instead of a background thread to periodically check for new data, and we dynamically updated our menu list based on the data we brought back, bringing even greater interactivity into our fairly basic app. Remember you can check out all the code here.
In our next few articles we'll look at integrating notifications within our apps to make notifying the user of a change more prominent and useful, and we'll also start to explore custom user interfaces, to improve the experience for users of your Mac OS X apps, both for status bar apps as we've been focusing on thus far, but also for window based apps.
Hopefully you're enjoying my articles on RubyMotion development - as always, let me know your thoughts, comments and questions below, or contact me on Twitter @ejdraper!
CommentsHow to build a RubyMotion status bar app that updates in the background Nov 7 2013
In our last post we looked at how easy it is to create an OS X menu bar app using RubyMotion. This time around, we'll look at one of the ways we can make status bar apps more useful - having it fetch and display data from an external source in the background. In our specific example, we'll be wrapping the top commandline tool, to pull out CPU usage and display it. It should demonstrate how you could replace that and roll in calls to other system commands for different data, or even API calls to web services to pull in live data from there too.
The code is open source and available here. It's based on using osx-status-bar-app-template that we detailed in the last post, so if you want to build this yourself as we go along in the article, start by installing the osx-status-bar-app-template gem and creating a new app using that template.
Extensions
First of all, we have one other code file besides the app delegate in the codebase. In app/extensions/ns_menu_item.rb, we have the following:
class NSMenuItem
  def checked
    self.state == NSOnState
  end

  def checked=(value)
    self.state = (value ? NSOnState : NSOffState)
  end
end
If you've worked with Ruby before, you'll know that you can re-open classes to add methods to them, and if you've worked with Objective-C much you'll know that you can do something similar with categories. All we're essentially doing here is adding some convenience short-hand methods to menu items to allow us to check and uncheck them, and to see if they're checked. You'll see how this is used shortly.
Setting up our menu
Let's setup the menu items we need in app/app_delegate.rb. The idea is we'll have three options, Total to show total CPU usage, User to show the user CPU usage, and System to show the sys CPU usage value. In our applicationDidFinishLaunching method, alongside the default menu items created for about and quit, add our three new menu items in:
@total_item = createMenuItem("Total", 'clickTotal')
@total_item.checked = true
@status_menu.addItem(@total_item)

@user_item = createMenuItem("User", 'clickUser')
@user_item.checked = false
@status_menu.addItem(@user_item)

@system_item = createMenuItem("System", 'clickSystem')
@system_item.checked = false
@status_menu.addItem(@system_item)
We'll also add the following to applicationDidFinishLaunching:
@user = 0
@sys = 0
self.updateStatus
We'll be implementing updateStatus shortly, but it's what sets the title text in the menu bar based on the current values, which we've defaulted to 0 above.
Next up, we need to implement the event handlers for each menu item click. We're going to get a bit funky with the selection, so that if you check Total, it only shows that, and unchecks the other two. You can select either or both of the other two to show, and if you deselect both, it goes back to having Total selected. Our three event handlers look like this:
def clickTotal
  @user_item.checked = false
  @system_item.checked = false
  @total_item.checked = true
  self.updateStatus
end

def clickUser
  @total_item.checked = false
  @user_item.checked = !@user_item.checked
  self.mustSelectSomething
  self.updateStatus
end

def clickSystem
  @total_item.checked = false
  @system_item.checked = !@system_item.checked
  self.mustSelectSomething
  self.updateStatus
end

def mustSelectSomething
  @total_item.checked = true if !@user_item.checked && !@system_item.checked
end
If you select the total one, it automatically unchecks the other two, and you can't click to unselect it. If you select either user or system, it will uncheck the total one, and either uncheck or check itself, depending upon its current state. They both also use the mustSelectSomething method to double check and ensure that if after the click the result is that neither is selected, then the total becomes selected again. All three event handlers finish up by triggering a call to update the status text. Let's look at how that is implemented next:
def updateStatus
  if @total_item.checked
    @status_item.setTitle("CPU: #{sprintf("%.2f", @user + @sys)}%")
  else
    text = []
    text << "User: #{sprintf("%.2f", @user)}%" if @user_item.checked
    text << "Sys: #{sprintf("%.2f", @sys)}%" if @system_item.checked
    @status_item.setTitle(text.join(", "))
  end
end
Here is where we're using the status of each menu item, checked or unchecked, to decide what to show. If total is checked, we're showing the sum of both the user and sys values as a total CPU usage figure. If not, then we're showing user, sys, or both, based on which ones are checked. Hopefully by now it's obvious why we added those convenience methods to the menu items, to make seeing if an item is checked a bit less verbose!
If you run the app, you'll see it works, showing 0.0% for all figures, but allowing you to toggle between the various different displays. So what we're now missing is the external source to give us data, and a way to have it run in the background to update the status bar all on its own.
Driven by data
We're going to use the top command as the source for our values, and we're going to use IO.popen to open up a pipe to the command sampling values continuously. top produces a lot of data, so we'll be filtering it out and looking for the specific line that contains CPU values, then parsing those out. It's not too tricky, and the whole thing looks like this:
def startTop
  IO.popen("top -l 0") do |f|
    while true
      unless((line = f.gets).nil?)
        if line[0...10] == 'CPU usage:'
          line.gsub!("CPU usage: ", "")
          line.split(", ")
          @user, @sys = line.split(", ").map { |p| p.split("%").first.to_f }
          self.updateStatus
        end
      end
    end
  end
end
Running top -l 0 is what gives us the output in a format we can work with from a script - by default top is pretty clever, and replaces the output every sample so that when you run it in a terminal, it seems like it updates on screen (rather than scrolling in new data for each sample). By passing -l we're asking it to run for a specific amount of samples, giving us the output in a raw form, and by specifying 0 rather than a set amount, we're telling it we want it to run infinitely. With a pipe open to that command running endlessly, we can then read each line, check to see if it's the line we're looking for, and then parse out the data. The lines we want look like this:
CPU usage: 3.79% user, 3.12% sys, 93.8% idle
Once we strip out the CPU usage: heading, we can then split on the comma to separate our values, and split on the % to separate the value from the name. We can then parse it as a float, and we just pull out the first two as our user and sys values (we don't use the idle value). This is an example of how Ruby's superior string handle really comes in handy, you can see what our breakdown and parsing of that line looks in a Ruby console:
> line = "CPU usage: 3.79% user, 3.12% sys, 93.8% idle"
=> "CPU usage: 3.79% user, 3.12% sys, 93.8% idle"
> line.gsub!("CPU usage: ", "")
=> "3.79% user, 3.12% sys, 93.8% idle"
> line.split(", ")
=> ["3.79% user", "3.12% sys", "93.8% idle"]
> line.split(", ").map { |p| p.split("%") }
=> [["3.79", " user"], ["3.12", " sys"], ["93.8", " idle"]]
> line.split(", ").map { |p| p.split("%").first }
=> ["3.79", "3.12", "93.8"]
> line.split(", ").map { |p| p.split("%").first.to_f }
=> [3.79, 3.12, 93.8]
We fairly effortless and reliably go from a string output from top, to pulling out the two values we need. From there, it calls updateStatus to reflect the updated values, and we're golden. Except, how does this method get called? If you try to call startTop directly from within applicationDidFinishLaunching, then it will fire up and continuously run to pull out values - but you can't interact with the menu bar app at all, and it won't update beyond the initial value being shown. This is because our startTop method runs endlessly, and thus blocks the main thread when called in that manner. Any UI interactions or any further interaction with the app doesn't work. We need a way to explicitly call that method in the background of our app, so it happens on a separate thread. Luckily, this is fairly straightforward - add this to the end of applicationDidFinishLaunching:
self.performSelectorInBackground('startTop', withObject: nil)
This call returns immediately, firing up that method in a background thread, and meaning that interaction with the app continues as normal, and our startTop method keeps running in the background, parsing out the latest values and updating the status bar title text. Voila, we have an app that is talking to a data source in the background, and updating the status bar all on its own. Replacing the startTop method with whatever data source you want to regularly query to return data to show in the status bar would be fairly trivial.
If you fire up the app now, you can see it update in real-time:
![]()
What next?
What data sources can you think of that'd be useful to ping and show data from in your status bar? Chances are there are a bunch of things you'd like to keep an eye on, and now with just a small amount of code, and RubyMotion, you can! With CPUTrackerMenu too, you can even make sure that your own app isn't taking up too much CPU by running in the background!
In a future post we'll look at integrating with web service APIs from within your RubyMotion app - in the meantime, any questions related to this article, a previous article, or RubyMotion dev in general, let me know in the comments below, or catch me on Twitter @ejdraper!
CommentsHow to quickly get started creating status bar apps for Mac OS X using RubyMotion Oct 18 2013
Recently here at KickCode we've been working on our first Mac OS X application, due for submission to the App Store shortly, and using RubyMotion. We'll be unveiling it shortly, but it's a fairly simple utility app that lives in the status bar. Status bar apps are quite useful, whethere it's a utility for day to day productivity tasks, or whether it's a connection or window into an online service, that provides background syncing, notifications, or other information.
New gem
The good news is, they're fairly simple to get up and running using RubyMotion! Indeed, as with a lot of work in RubyMotion, it's a lot less effort than building the equivalent in Xcode and Objective-C! And we've just made it a bit easier still, with a small gem called osx-status-bar-app-template that provides you with a new RubyMotion app template.
Simply run:
gem install osx-status-bar-app-template
And then once installed, you can go ahead and create your new RubyMotion app using the template:
motion create --template=osx-status-bar-app TestStatusBarApp
Then simply fire it up to see the basic skeleton app in action, ready for building upon:
cd ./TestStatusBarApp
rake
At this point you'll see an entry called "TestStatusBarApp" appear in your status bar, and clicking it will show you three options - a working about window, a custom action to show off how you handle menu item events, and a quit command. Note that the app doesn't appear in the dock or the cmd+tab window, as it resides solely in the status bar!

How it works
As this is a RubyMotion template, it basically just creates the app skeleton for you, so we can delve into the code to understand better how it's working, and how we can build on it.
To make the app status bar only, and have the dock and cmd+tab window ignore it as a targetable window, we have added the following to our Rakefile:
app.info_plist['LSUIElement'] = true
We've also updated the spec/main_spec.rb to reference and test the status bar menu items instead of windows by default - you'll want to update this as you make changes to your menus.
The rest of the good stuff happens inside app/app_delegate.rb as you might expect - and it's surprisingly little code. In our applicationDidFinishLaunching method, we're setting up a new NSMenu, and then creating a status item to sit in the system status bar:
@status_menu = NSMenu.new

@status_item = NSStatusBar.systemStatusBar.statusItemWithLength(NSVariableStatusItemLength).init
@status_item.setMenu(@status_menu)
We're using NSVariableStatusItemLength so that the status item can match the content. It's easier to setup this way, but bear in mind that you probably don't want the content that'll appear in the status bar to be changing width too dramatically or too often, as that could be quite annoying!
Next up, we just set the highlight mode to true so that when you click the status bar item you get the blue highlight to show that you've clicked it, and we're also setting the title to the app name:
@status_item.setHighlightMode(true)
@status_item.setTitle(@app_name)
After that we can setup some of our menu items, but we're using a helper method to make things a little less verbose:
def createMenuItem(name, action)
  NSMenuItem.alloc.initWithTitle(name, action: action, keyEquivalent: '')
end
This just sets up a new menu item with the specified title and action (more on actions in a minute), and returns it. We can then use it like this:
@status_menu.addItem createMenuItem("About #{@app_name}", 'orderFrontStandardAboutPanel:')
@status_menu.addItem createMenuItem("Custom Action", 'pressAction')
@status_menu.addItem createMenuItem("Quit", 'terminate:')
Actions are just references to methods that will act as event handlers for the menu item being clicked. The first and third items have actions that are "built-in" to OS X apps - namely with the default app structure, the about panel is already there and ready to use, and "orderFrontStandardAboutPanel:" shows that window. It contains a list of credits derived from a text file in the "resources" folder of your project ("Credits.rtf"). Within our new template, this is still the same as the one that comes with the default OS X template for RubyMotion, and should be edited to reflect your own details. The third item, with action "terminate:", as you might expect refers to a method that is already accessible and that shuts the app down. It's important to provide a way for the user to shutdown your status bar app, as it doesn't appear in the dock or the "Force Quit" list!
The second menu item there is more interesting - "pressAction" is our own defined method, and acts as our event handler for a click on that item:
def pressAction
  alert = NSAlert.alloc.init
  alert.setMessageText "Action triggered from status bar menu"
  alert.addButtonWithTitle "OK"
  alert.runModal
end
This too is fairly basic - we're just popping up an NSAlert dialog to show that the menu item has been clicked, and the event handler has correctly received the event. That's all there is to creating a basic status bar app in RubyMotion!
Extending our app
Now let's extend our default app skeleton provided by the gem to do something a little more interesting. We'll have a menu item action that updates the content of the status bar item itself. First of all, let's update our spec to expect a fourth menu item:
it "has four menu items" do
  @app.delegate.status_menu.itemArray.length.should == 4
end
Then, in our app delegate, lets setup a new menu item above the "quit" item, called increment:
@status_menu.addItem createMenuItem("Increment", 'pressIncrement')
Lastly, let's implement our event handler:
def pressIncrement
  @count ||= 0
  @count += 1

  @status_item.setTitle("#{@count} times")
end
Here we're establishing a variable to keep track of our count, if one isn't already set, then we're incrementing it. Finally we're referencing our main status item (which remember refers to the item that sits in the status bar itself, not any of the child menu items that show when you click on the status bar item), and we're updating the title with the count. Now if you fire up the app, and click "Increment" from the status bar app menu, you'll see the value in the status bar update!

From here you can see how it'll now be fairly straightforward to start building slightly more useful functionality into the app, either hooking into system stats or calls to provide data, or perhaps calling out to a third party API to do interesting things, making it all available from the status bar. In a future article we'll look at how to run things in the background to do something interesting that updates the status bar without direct user interaction.
Feedback welcome
In the meantime, check out the gem, and let me know what you think! Any questions or comments on the above are welcome, either below or @ejdraper on Twitter!
CommentsHow to refresh your RubyMotion app for iOS 7 in 30 minutes or less Oct 9 2013
With iOS 7 now launched, and with one of the highest adoption rates ever seen amongst mobile phone owners (estimates put it at around 200 million inside the first few days, compared with 100 million in a similar timeframe for iOS 6), it's a great time to upgrade any apps you might have built to really look snazzy on the wildly revamped OS. Your apps will work of course, regardless of whether you take the time to update them, but if you want them to fit in with the much improved user interface, there are a few quick wins available.
Upgrading RubyMotion
You'll need to make sure you're running the latest RubyMotion, and make sure your app is building with it (if you've locked into a previous version before in your Rakefile, either lock in to the latest version, or remove the version to use the latest one you have installed, after running the update). Now the nice thing is that with Xcode 5, iOS 7 SDK, and RubyMotion 2.8+ installed, rebuilding your app will let you see your app running with the iOS 7 style UI on the iOS 7 simulator. If you're using default controls such as navigation controllers, tab bars, and table views etc, your app will get a nice visual upgrade, that is completely backwards compatible (i.e. still uses the familiar old styles) on iOS 6 and previous.
New shiny
Having iOS 7 skins for default controls is all well and good, and puts you above a vast majority of apps that for whatever reason will never see another update (an app has to be rebuilt with the iOS 7 SDK and re-submitted, even if there are no other changes, to get the new default look for iOS 7, otherwise it'll look like an iOS 6 blast from the past!). But what about nice new features, like the status bar colour tinting? With a small little snippet, you can get the super sweet colour way tinting that effortlessly melts into the status bar, and which serves two distinct purposes. The first is that the visual effect gives your app the feel of having more real estate and room to play with, as there isn't an abrupt cut-off for the status bar any longer. The second is that it can help to reinforce branding, with your app or company colours now nailed to the mast for the header of their phones screen, with no status bar looming over everything else. Here is how we go about doing that:
For an app that has the root view controller set to a UINavigationController, then from within our AppDelegate we need to add the following:
def application(application, didFinishLaunchingWithOptions:launchOptions)
  ...

  @window.rootViewController.navigationBar.barTintColor = UIColor.colorWithRed(0.64, green: 0.64, blue: 0.64, alpha: 1.0)
  @window.rootViewController.navigationBar.translucent = true
  @window.rootViewController.navigationBar.tintColor = UIColor.blackColor

  ...
  @window.makeKeyAndVisible
  true
end
Now obviously you can substitute your own colors in, but essentially we've picked a nice color for the status bar heading, and we've set translucent to true to let us see the shadow of things passing through underneath it, which is a nice effect. Lastly we set the tint color to black so that the icons in the status bar look right with our color, but again you can find a pair that matches with your colors and branding.
I'm testing this out on our app AlbumAlert, and you can see that when you fire it up, you end up with something like this:
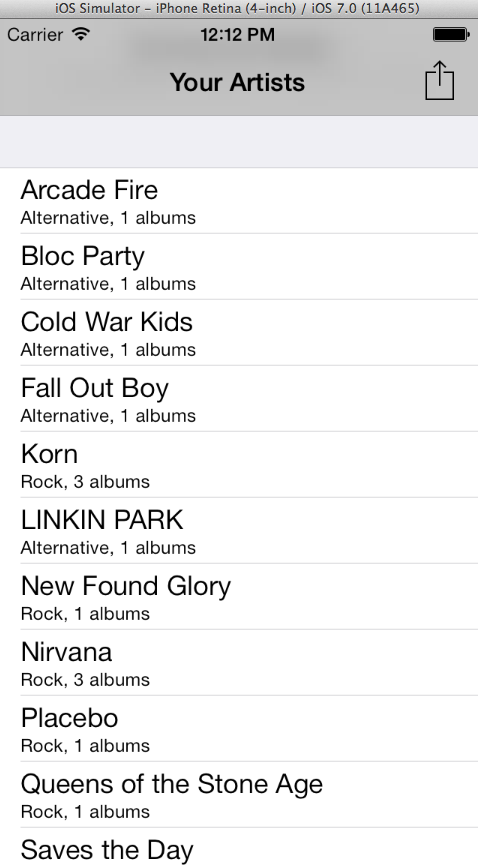
So that all works fine, however I imagine at this point that you probably don't want to support iOS 7 solely. You may in time make that switch, or at least offer features that depend upon iOS 7, but if you're using mainly default UI controls, you can easily ensure you still support iOS 6 and previous too. Let's see what the situation is with our changes on iOS 6 by running our app with the 6.1 simulator (you will need to make sure it's installed from within the Xcode Downloads section if you're having issues, as well as any other simulators you want to test with). To fire up a specific simulator version:
rake target=6.1
Replace 6.1 with whatever version you want to test with - after it builds and runs, you'll see however that we have an error:
Terminating app due to uncaught exception 'NoMethodError', reason: ' 315:in `application:didFinishLaunchingWithOptions:':
undefined method `barTintColor=' for #<UINavigationBar:0xab390c0> (NoMethodError)
This is because the barTintColor method is new to iOS 7 - so how do we ensure we do one thing for our UI in iOS 7, and stick to the older way of doing things for past versions? We can query the version number of the OS in this particular case, which changes our code as follows:
if UIDevice.currentDevice.systemVersion.floatValue >= 7.0
  @window.rootViewController.navigationBar.barTintColor = UIColor.colorWithRed(0.64, green: 0.64, blue: 0.64, alpha: 1.0)
  @window.rootViewController.navigationBar.translucent = true
  @window.rootViewController.navigationBar.tintColor = UIColor.blackColor
else
  @window.rootViewController.navigationBar.tintColor = UIColor.colorWithRed(0.64, green: 0.64, blue: 0.64, alpha: 1.0)
  @window.rootViewController.navigationBar.translucent = false
end
Here we are using our specific color as the tintColor for pre-iOS 7 versions, which will keep our color branding, but isn't quite as snazzy as the new iOS 7 UI. We're then only setting barTintColor when the version is 7.0 or greater. For other feature differences you may find specific flags you can check to determine if the feature is available, rather than relying on the overall OS version number, but in this case it's an easy check to make to differentiate between iOS 7, and previous OS versions.
Now if we fire up our app in 6.1 it'll look as follows:

You can re-test in iOS 7 too to ensure it still has our nice new snazzy style navigation bar, which it does. And that's it! We're taking advantage of a new design feature to make our app feel more at home on iOS 7, while maintaining backwards compatibility for users on older versions of the OS.
Final thoughts
This is just a quick peek at the low hanging fruit on offer, where you can spend maybe 30 minutes on each RubyMotion iOS app you have, re-submit them all for approval, and take advantage of the wave of iOS 7 app updates happening as users update their devices. Instead of being left behind and reminding your users of a forgotten user interface, you can be at the forefront of Apple's new interface revolution.
Remember, if you need any help with your RubyMotion app, I'm available by the hour, or by the week, and can take your app to the next level. Contact us today to find out how.
CommentsPage 2 of 2 | Previous page