
Previewing video and audio when capturing on Mac OS X with RubyMotion May 7 2015
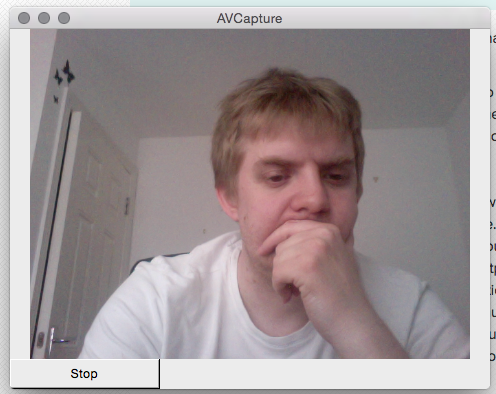
In the last article we covered how to capture video and audio from attached devices on Mac OS X using RubyMotion. In this article we’re going to extend our basic AVCapture app to display a preview of the video being captured, and audio levels, so that capturing is more responsive and you can be sure you’re recording what you want to record.
Previewing video
First thing first, we’ll need to make room for our preview. Let’s move our button to start and stop recording to the bottom left of the window - we’ll put the video preview above it, and it’ll leave room for our audio levels meter to the right of the button. We’ll add a constant for the button size now so we can refer to it elsewhere, so add this just inside the AppDelegate class declaration:
class AppDelegate
  BUTTON_SIZE = [150, 30]
Then change set_button_frame to the following:
def set_button_frame
  @button.frame = [[0, 0], BUTTON_SIZE]
end
With the button out of the way, we can then setup the video preview. First of all, we need a view to display it in, so in our buildWindow setup method, at the bottom we’ll add the following:
bounds = @mainWindow.contentView.bounds
bounds.size.height -= BUTTON_SIZE.last
bounds.origin.y += BUTTON_SIZE.last
@view = NSView.alloc.initWithFrame(bounds)
layer = CALayer.layer
@view.setLayer(layer)
@view.setWantsLayer(true)
@mainWindow.contentView.addSubview(@view)   end
We’re using the BUTTON_SIZE constant to work out the rest of the window area available after the button, and then we’re creating a blank view with that space. We need to setup a default blank layer using CALayer.layer, and we need to set setWantsLayer to true to be able to be able to add a sublayer which we’ll be doing next from within didStartRunning:
def didStartRunning
  @video_preview = AVCaptureVideoPreviewLayer.alloc.initWithSession(@session)
  @video_preview.frame = @view.bounds
  @view.layer.addSublayer(@video_preview)

  url = NSURL.alloc.initWithString("file:///Users/#{NSUserName()}/Desktop/temp#{Time.now.to_i}.mp4")
  @output.startRecordingToOutputFileURL(url, recordingDelegate: self)
end
Before we start our recording, we’re using the AVCaptureVideoPreviewLayer class, configured against our @session, to be able to create a layer; then we’re setting the bounds to match the view, and then we’re adding it as a sublayer. That’s it!
Run the app now, and when you start recording the captured output appears in the window above our button, and it disappears when we stop our capture session. Pretty cool huh?
[code]
Coping with window resizes
We already handled window resizes for our centered button in the code, based upon our centered button code example here - however now our button is in the bottom left (and stays there), that is no longer the problem. Instead, our video preview doesn’t properly size up or down on resize when already active. So let’s handle the resize event in the same way, and re-initialize the view holding our video preview layer any time a resize happens to properly update the preview. First things first, let’s add a method to handle the setup and updating of our video preview frame, which we can now call both on initial capture start, as well as on resize, to keep the preview size in sync with the window:
def update_video_preview
  if @view
    @video_preview.removeFromSuperlayer if @video_preview
    @view.removeFromSuperview
  end

  bounds = @mainWindow.contentView.bounds
  bounds.size.height -= BUTTON_SIZE.last
  bounds.origin.y += BUTTON_SIZE.last
  @view = NSView.alloc.initWithFrame(bounds)
  layer = CALayer.layer
  @view.setLayer(layer)
  @view.setWantsLayer(true)
  @mainWindow.contentView.addSubview(@view)

  @video_preview.frame = @view.bounds
  @view.layer.addSublayer(@video_preview)
end
As you can see, we’re coping with an existing @view and @video_preview layer, removing them from their parent view/layer as appropriate, before using the window bounds (minus the button size) to calculate the room left for the preview - the same as we were doing before. We then add the view, set the video preview layer bounds based on the view we’ve setup, and add the video preview layer as a sublayer. The only thing we’re not doing here is creating the actual video preview layer - this we will do only when the capture session starts, because if we did it in update_video_preview, getting called on each resize, we’d find that recreating new video preview layers against the session would actually trigger it to stop recording output for some reason. Seeing as we don’t need to reinitialize that anyway, we just need to remove it from the old view and add it to the new one, then it doesn’t matter too much.
So now we need to reference this when the capture session starts, so that our code works as it did before - the first part of didStartRunning should now look like this:
def didStartRunning
  @video_preview = AVCaptureVideoPreviewLayer.alloc.initWithSession(@session)
  self.update_video_preview
We’ll create the video preview layer as before, and then we’ll call our new method for updating the video preview, in this case initialising the view and adding the sublayer to get the output showing. Lastly, we just need to hook things in on resize, as so within windowDidResize:
def windowDidResize(notification)
  self.set_button_frame
  self.update_video_preview if @is_running
end
We check to make sure @is_running is equal to true, to be sure that it’s worth bothering with a video preview.
Now if you run the app, you’ll see that resizing the window resizes the video output preview in real-time - pretty neat!
One thing we now need to fix though is that with the way this is setup, you’ll notice trying to record more than one video during one run of the app doesn’t work. The first one records fine, and from then on, it doesn’t begin recording. This is because re-initializing the video preview layer in this way each session (while all of the rest of the session and recording setup is unchanged) causes an error (AVErrorSessionConfigurationChanged specifically), somewhat similar to how we didn’t want it re-initialised on each window resize or else it’d stop recording. So we’ll change didStartRunning so it only sets up @video_preview when it doesn’t already exist:
def didStartRunning
  @video_preview ||= AVCaptureVideoPreviewLayer.alloc.initWithSession(@session)
Now when we start multiple recordings in one run of the app, none of the AV related configuration or setup changes, and so we’re free to just start and stop the session and create as many recordings as we want.
When you do get an error that seems to prevent recording (in our app it’ll just keep going back to Start and shutting the webcam back off a few seconds after pressing Start), you can usually get to the bottom of it from within didFinishRecordingToOutputFileAtURL. That will still get called, but you can now use the error parameter to see what’s going on. The message isn’t always very useful, but the code property will provide a value you can check against the error codes here, which along with the description of each error further down that document, should give you enough to go on. Those are also very useful of course because in a production ready app, you’d want to cope with a lot of those errors and feed them back to the user, for things such as being out of disk space etc.
[code]
Tapping into audio levels
Next up, let’s use the space to the right of the start/stop button to show an audio level meter. Before we get in to the user interface though, first we’ll look at how to tap into the necessary audio output to poll for audio peak and average levels.
We need to add an audio output, so in applicationDidFinishLaunching, below where we setup our movie file output, let’s add this:
@audio_output = AVCaptureAudioDataOutput.alloc.init
@session.addOutput(@audio_output) if @session.canAddOutput(@audio_output)
This creates an audio data output and adds it to the session, ready for us to use. The rate of change for the average power and peak hold levels on audio channels though is so quick that there aren’t any delegate methods or notifications we can hook into to watch for changes, so instead we just need to poll for it - the resolution is up to you and the app you’re building, but in our example we’ll be polling 10 times a second. We’ll do that with a scheduled interval, so add this to the bottom of applicationDidFinishLaunching:
NSTimer.scheduledTimerWithTimeInterval(0.1,
  target: self,
  selector: 'checkAudioLevels',
  userInfo: nil,
  repeats: true)
This repeats endlessly while the app is running, and runs every 0.1s. Now we just need to implement checkAudioLevels and inspect the audio output:
def checkAudioLevels
  return unless @is_running
  sum = 0
  @audio_output.connections.first.audioChannels.each_with_index do |channel, index|
    NSLog "CHANNEL[#{index}]: avg: #{channel.averagePowerLevel}, peak: #{channel.peakHoldLevel}"
    sum += (channel.averagePowerLevel + channel.peakHoldLevel) / 2.0
  end
  avg = sum / @audio_output.connections.first.audioChannels.count
  NSLog "AVERAGE AVERAGE: #{avg}"
end
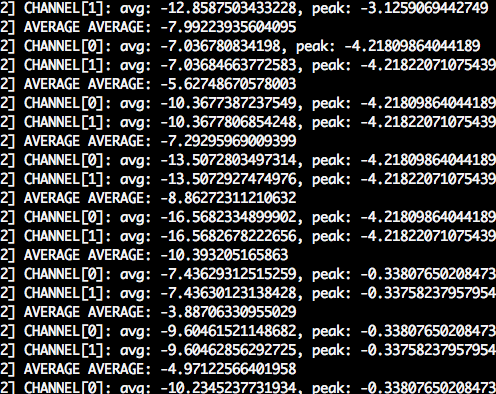
Let’s run through what this is doing - firstly we make sure we’re running a capture before we do anything, and if it is, we loop through the channels on the audio outputs connection (it can have only one connection), and we’re logging out the average power and peak hold level. We’re also adding the average of those two values for each channel to a running total, and then creating an average single value based on both average power and peak hold, for all available audio channels, and logging that out too. If you run the app now, then start the session, you’ll notice that any noises make a significant change to the numbers being shown on the console.
[code]
Displaying audio levels visually
So we have the data, but we need a way of displaying that to the user so that they can see that audio levels are as expected. We’re going to use a simple custom meter control that I created to display the levels - the idea being that it’s a bar, with color thresholds such that normal volume shows green, louder shows yellow, and extremely noisy shows as red. The code for the control itself is available here, and you’ll be able to see a bit more about how it works in a chapter in my forthcoming book.
First things first then, let’s add the gem we need to our Gemfile:
source 'https://rubygems.org'

gem 'rake'
# Add your dependencies here:

gem 'motion-meter'
Then in our applicationDidFinishLaunching, above the NSNotificationCenter and NSTimer code, we’ll add our new control as follows:
@audio_level = Motion::Meter::ThresholdMeter.alloc.initWithFrame(CGRectZero)
@audio_level.add_threshold(-20, -5, NSColor.greenColor)
@audio_level.add_threshold(-5, 3, NSColor.yellowColor)
@audio_level.add_threshold(3, 10, NSColor.redColor)
@audio_level.min_value = -20
@audio_level.max_value = 10
self.set_audio_level_frame
@mainWindow.contentView.addSubview(@audio_level)
The meter control allows thresholds to be set, and for that we just need to define a lower and upper limit for the threshold, along with a color to use for rendering the meter if the current value is within that threshold. We also set a min and max value to prepare the control for the range of values to expect - typically our calculated average works out at around somewhere between -20 and 10 it seems from the logging, so we’ll set it up accordingly.
We’ll also need to add this method that is called to setup the frame too:
def set_audio_level_frame
  @audio_level.frame = [
    [BUTTON_SIZE.first, 0],
    [@mainWindow.contentView.bounds.size.width - BUTTON_SIZE.first, BUTTON_SIZE.last]
  ]
end
And the reason that’s in its own method, as with the set_button_frame, is so that we can also call it from the resize handler when the window is resized. Therefore, windowDidResize becomes:
def windowDidResize(notification)
  self.set_button_frame
  self.set_audio_level_frame
  self.update_video_preview if @is_running
end
Lastly, we need to be setting the value from within our checkAudioLevels method, so the control can use the latest value each time we check the levels - here we’re using our calculated average value:
def checkAudioLevels
  return unless @is_running
  sum = 0
  @audio_output.connections.first.audioChannels.each_with_index do |channel, index|
    sum += (channel.averagePowerLevel + channel.peakHoldLevel) / 2.0
  end
  avg = sum / @audio_output.connections.first.audioChannels.count
  @audio_level.value = avg
end
You’ll notice we’ve also lost our logging statements - now that we’re representing those values visually through our meter control, they are no longer needed.
If we fire up our app, and click Start, we’ll see our video preview appear, and below it, alongside our button, a meter that reacts to the input audio volume of our recording - try clapping and see it react accordingly, jumping into the yellow or red thresholds.

[code]
Next steps
There is obviously a whole lot more that you could do with the AVFoundation framework, we’ve really just scratched the surface of what’s possible here. Capturing still images, altering the configuration and presets to change the quality of the output, processing data to modify it on the fly, as well as doing more interesting things with the output such as streaming or uploading - there is a lot of potential. In my book, you’ll be able to read this content and more to cover capturing audio and video in more detail, as well as a whole bunch of other OS X app building topics using RubyMotion. If you’re interested in being able to build apps and utilities for OS X quickly and easily, you’ll want this book! So sign up now below to be notified when early access starts very soon (subscribers will get an exclusive discount!).
Other than that, feel free to tweet me @ejdraper, or comment below with any questions or comments.
technical • rubymotion • code • kickcode