
Customise a Mac OS X window further with RubyMotion and MotionKit Dec 19 2014
In our last article we looked at ways to build up a basic Mac OS X app window, adding controls and some interactivity. It was an introduction to how to layout and position controls to achieve the effect you want in an application window, but there are tools to make our lives easier, especially when it comes to building things that are more complex. Enter MotionKit.
MotionKit provides a whole layer of abstraction for building up your user interface, and provides a neat DSL to do it. It makes building complex user interfaces much easier, and even better than that, it actually works on iOS as well as OS X, so it’s great to get to know it, as it’ll save you time!
First of all, let’s build up the user interface we had in the last tutorial in MotionKit. It’ll give us a good idea of how much easier things are! We’ll do this by using a separate layout class to construct our UI elements, and this will not only more cleanly separate our elements, but will also make it so that we can do more with less code.
We need to add our new dependency for the motion-kit gem first, so add this to Gemfile:
gem 'motion-kit'
Then run the following:
bundle install
Then we’ll create our new file at app/main_layout.rb that’ll describe our UI components:
class MainLayout < MotionKit::Layout
  SIZE = [150, 30]

  view :button, :label

  def layout
    add NSButton, :button do
      title "a test button"
      size SIZE
      autoresizing_mask :pin_to_center
      frame from_center
    end
    add NSTextField, :label do
      bezeled false
      drawsBackground false
      editable false
      selectable false
      size SIZE
      autoresizing_mask :pin_to_center
      frame from_center(up: 3)
    end
  end
end
This creates the same button and label (using a text field as before), and uses provided helper methods for pinning the items to the center, and autoresizing. This means our app/app_delegate.rb gets dramatically simpler, as we can remove our didResize handler, and we can replace our control initialization now with:
@layout = MainLayout.new
@mainWindow.contentView = @layout.view

@label = @layout.get(:label)
@button = @layout.get(:button)
@button.target = self
@button.action = 'button_pressed:'
This creates the layout, sets the view of the window to be that of the layout which handles the UI now, and then grabs a reference to the two controls - we want a reference to the button to be able to attach once more our event handler for the click, and we have the reference to the label for updating the text when the button is pressed. That event handler stays the same as before and works without any other modification.
Here is how it looks now - the same as how we had it in the last tutorial:

[code]
So now we’ve replaced what we had before with something that is a bit tidier and easier to understand - let’s build on that to add slightly more interesting functionality. Let’s build a basic calculator for adding two numbers together. This will require a few more controls to be setup, and gives us chance to look at another way to organise our controls - using AutoLayout constraints.
So let’s start by modifying our app/main_layout.rb file, replacing our existing UI with our desired new UI:
class MainLayout < MotionKit::Layout
  SIZE = [150, 30]

  def layout
    add NSTextField, :num1 do
      constraints do
        right.equals(:separator, :left).minus(10)
        top.equals(:separator, :top).minus(5)
        size [50, 30]
      end
    end
    add NSTextField, :separator do
      stringValue "+"
      bezeled false
      drawsBackground false
      editable false
      selectable false
      size_to_fit
      autoresizing_mask :pin_to_center
      frame from_center
    end
    add NSTextField, :num2 do
      constraints do
        left.equals(:separator, :right).plus(10)
        top.equals(:separator, :top).minus(5)
        size [50, 30]
      end
    end

    add NSButton, :calculate do
      title "Calculate"
      size_to_fit
      constraints do
        top.equals(:separator, :bottom).plus(10)
        left.equals(:separator, :left).minus(25)
      end
    end

    add NSTextField, :result do
      bezeled false
      drawsBackground false
      editable false
      selectable false
      size_to_fit
      constraints do
        top.equals(:calculate, :bottom).plus(10)
        left.equals(:separator, :left)
      end
    end
  end
end
That’s a bit more code than before, but when we consider we have five controls now, it’s not too much to get our heads around. Most of it is self-explanatory and similar to the previous code - we’re either creating NSTextField controls or NSButton controls, for the :result and :separator controls we want them to act like labels so much as before, we’re setting a few different things to make them look and behave as such. For :num1 and :num2 we want actual text field inputs, and then we have our button, :calculate. What is new are the constraints blocks, so let’s dig in deeper there.
constraints blocks are the hooks into AutoLayout and its constraints API, allowing us to specify UI placement based on a set of constraints. It manages all the constraints for the UI pieces alongside each other in the parent view, and sets out the UI to match them accordingly. You can reference other elements, and thus can build the elements off of one another, and in relation to each other, which makes things a whole lot easier. In this particular case, we’re setting our :separator label (the “+” sign) in the center, without any constraints, but using the frame and autoresize declarations we were using before. We’re then using AutoLayout constraints to ensure the :num1 and :num2 fields sit either side correctly. We then place the :calculate button relative to the :separator in the center, but below it, and again we place the :result label below that, in the center also. This gives us a whole lot of UI elements with not a lot of code, and it’s all pinned around the autoresizing central elements, which makes the whole thing scale nicely and automatically too. What’s not to like?
One other thing to note is that amongst the helpers provided for creating UI with MotionKit, there is a block you can wrap commands in, called deferred, which ensures that the helpers are run when all controls are initialised, and not just in the order they are called. This is especially useful when you are referencing other controls from your helper calls, however all constraints blocks are deferred by default, and so there isn’t a need to wrap our constraint code in a deferred block as well - but it could come in useful elsewhere, if you are using a lot of interdependent frame helpers.
The DSL itself for constraints is quite expressive, and allows you to match and specify on a great many things - for a full reference it’s best to check out the MotionKit docs, but as you can see in our code we’re making use of matching on the top, left and right sides of other controls, and using plus/minus calls to make relative adjustments.
We’re left with an expressive, neat way of describing our user interface, but now it’s back to app/app_delegate.rb so we can grab references to the controls we need, and hook up our calculator functionality! We can remove the existing UI setup code and instead use this:
@layout = MainLayout.new
@mainWindow.contentView = @layout.view

@num1 = @layout.get(:num1)
@num2 = @layout.get(:num2)
@calculate = @layout.get(:calculate)
@calculate.target = self
@calculate.action = 'calculate_result:'
@result = @layout.get(:result)
This sets up the view using our separate layout, as before, as well as grabbing the control references we need. It also sets up the click event handler for the button as before, only this time pointing at the calculate_result method. So all that remains is to implement that to fulfill the calculator functionality for our UI:
def calculate_result(sender)
  @result.stringValue = (@num1.stringValue.to_i + @num2.stringValue.to_i).to_s
end
And that’s it! It should look like this:
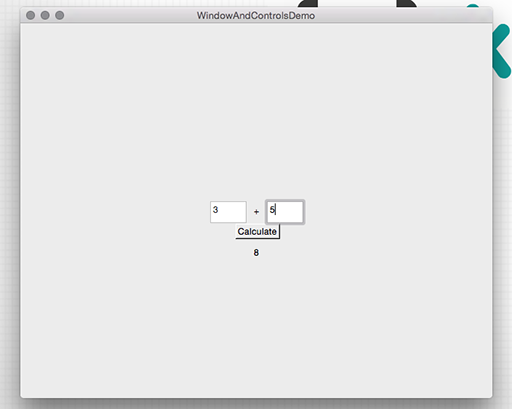
[code]
A super simple addition calculator UI implemented in a very small amount of code, all thanks to the beauty of MotionKit. In a future tutorial we’ll build up a more life-like example UI to demonstrate some other control and view classes, and some more MotionKit goodness.
technical • rubymotion • code • kickcode